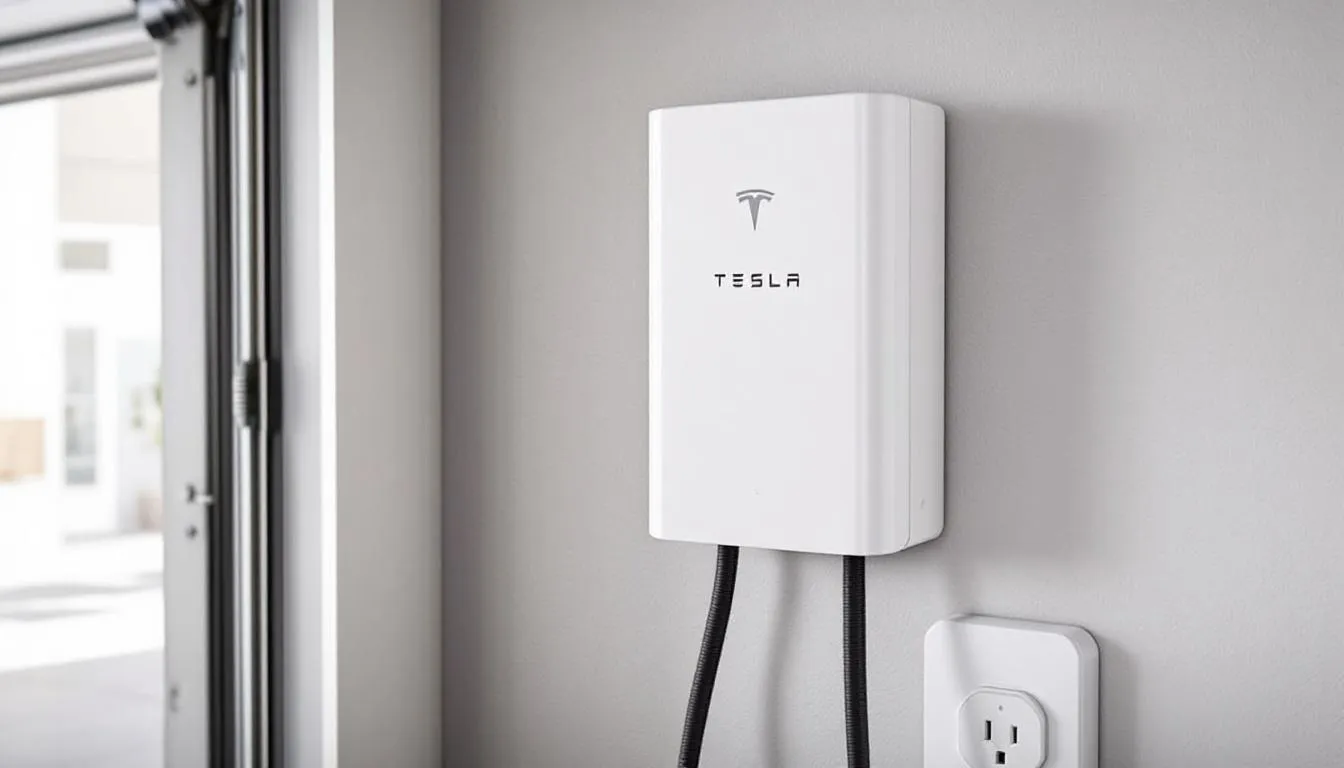
Step-by-Step Guide: How to Install GFCI Outlet Safely & Effectively
Learn how to install a GFCI outlet safely and effectively with our easy step-by-step guide. Read the article to ensure your

Key Takeaways
- GFCI outlets are required by California electrical code in bathrooms, kitchens, garages, outdoor areas, and other wet locations to prevent electrical shock
- While basic GFCI replacement can be done by homeowners, complex wiring situations require licensed California electricians for safety and code compliance
- Proper installation involves turning off power, identifying line and load wires correctly, and thorough testing to ensure protection
- California Title 24 building standards mandate GFCI protection in specific locations, with violations potentially affecting home insurance and resale value
- Monthly testing of GFCI outlets is essential to maintain electrical safety and early detection of potential hazards
Electrical shock injuries send thousands of Americans to emergency rooms each year, with many occurring in wet locations where gfci outlets could have prevented tragedy. These life-saving devices have revolutionized electrical safety, reducing electrocution deaths by an estimated 83% since their widespread adoption. For California homeowners, understanding how to install gfci outlet systems isn’t just about convenience—it’s about protecting your family and complying with some of the nation’s strictest electrical codes.
This comprehensive guide will walk you through everything you need to know about gfci installation, from understanding California’s specific requirements to determining when professional help is essential. Whether you’re replacing an existing outlet or planning a complete electrical upgrade, you’ll learn the critical safety precautions, proper installation techniques, and testing procedures that ensure your gfci protection works when you need it most.
Understanding GFCI Outlets and California Requirements
A gfci outlet (Ground Fault Circuit Interrupter) serves as your first line of defense against electrical shock by constantly monitoring the electrical current flowing through a circuit. These sophisticated devices can detect even the smallest imbalance—as little as 4-6 milliamperes—and cut power in less than 1/40th of a second, faster than a human heartbeat.
The technology works by comparing the current flowing out through the hot wire with the current returning through the neutral wire. When electricity takes an unintended path, such as through a person’s body to ground, the gfci receptacle immediately trips and disconnects power. This rapid response prevents the sustained electrical contact that causes severe injury or death.
California’s electrical standards go beyond basic National Electrical Code requirements, particularly through Title 24 energy efficiency standards that have mandated gfci protection in wet and damp locations since 2008. The California Electrical Code requires gfci receptacles in bathrooms, kitchens within 6 feet of sinks, garages, unfinished basements, crawl spaces, laundry rooms, and all outdoor areas.
The difference between gfci outlets and gfci circuit breakers lies in their scope of protection. While a gfci receptacle protects only the devices plugged into it (and potentially downstream outlets), a GFCI circuit breaker installed in your electrical panel protects the entire circuit. For comprehensive protection in areas like bathrooms where multiple outlets exist, many California electricians recommend whole-circuit protection.
According to Consumer Product Safety Commission data, gfci outlets prevent approximately 70% of electrocution deaths that would otherwise occur in residential settings. This dramatic safety improvement explains why California building codes have steadily expanded gfci requirements, with new construction and major remodeling projects requiring these devices in more locations than ever before.
When to Call a Licensed California Electrician vs DIY
Determining whether to tackle gfci installation yourself or hire a professional depends on several critical factors related to your specific electrical situation. Simple replacement scenarios where you’re swapping one gfci outlet for another at the end of a circuit with existing 3-wire cable represent the most straightforward DIY projects for experienced homeowners comfortable with basic electrical work.
However, complex situations requiring professional electricians include homes with aluminum wiring, knob-and-tube electrical systems, or installations involving multiple outlets on the same circuit. Aluminum wiring, common in homes built between 1965 and 1973, requires special handling techniques and compatible connectors that most homeowners lack. Improper connections with aluminum wire can create dangerous arcing and fire hazards.
California contractor licensing requirements mandate that electrical work beyond simple replacements be performed by licensed C-10 electrical contractors. These professionals undergo extensive training, carry liability insurance, and must pass comprehensive examinations covering both electrical theory and California-specific code requirements. Working with unlicensed individuals for electrical installations can void your homeowner’s insurance and create legal liability.
Permit requirements vary significantly across California’s major cities. Los Angeles requires permits for new gfci installations but not direct replacements, while San Francisco mandates permits for any electrical work that adds new circuits or changes existing wiring configurations. San Diego’s requirements fall somewhere between these extremes, with permits needed for work that increases electrical capacity or adds outlets in new locations.
Insurance and liability considerations become particularly important when performing electrical work without proper licensing. Many homeowner’s insurance policies explicitly exclude coverage for damage caused by unpermitted electrical work or installations performed by unlicensed individuals. Additionally, selling a home with unpermitted electrical modifications can complicate real estate transactions and require expensive remediation.
The safest approach involves consulting with a licensed California electrician for an assessment before beginning any gfci installation project. They can evaluate your specific situation, determine permit requirements, and identify potential complications that might not be apparent to inexperienced installers.
Tools and Materials Needed for GFCI Installation
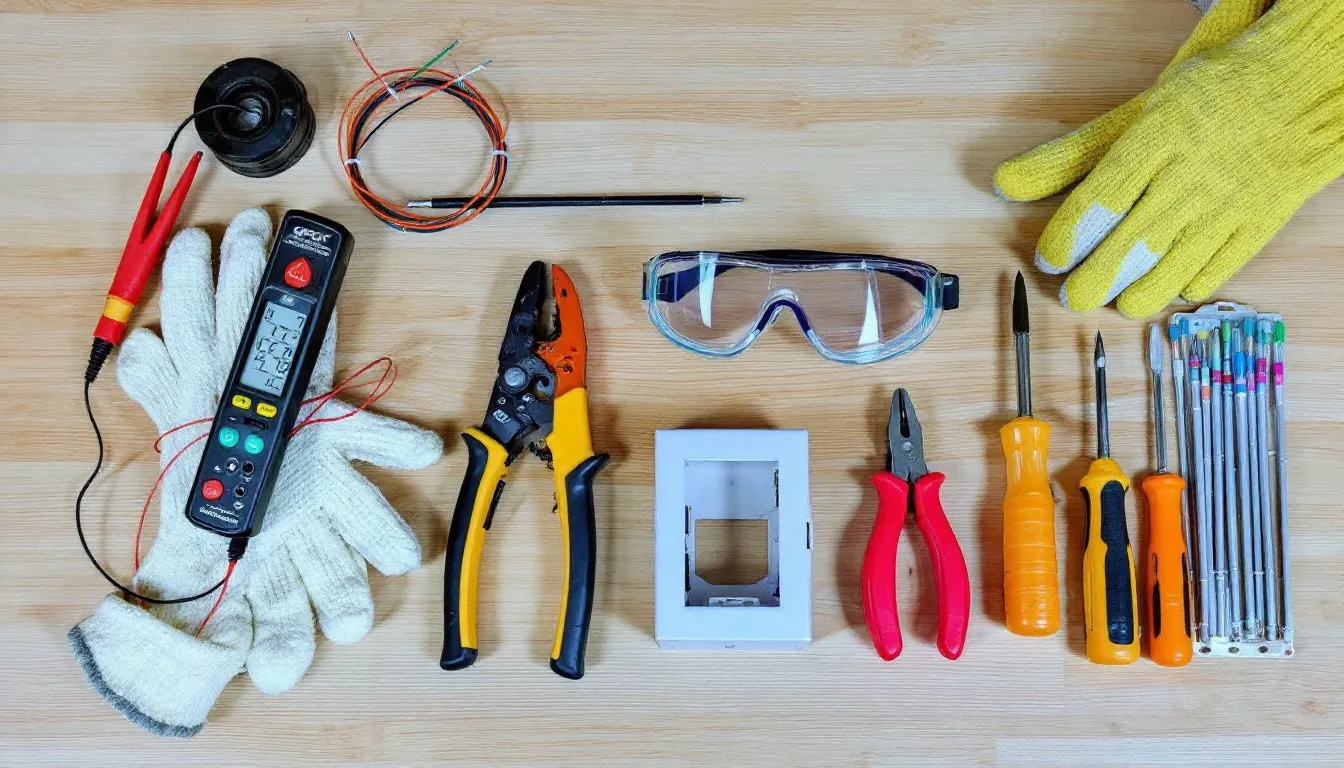
Successful gfci installation requires specific tools designed for electrical work, with safety being the primary consideration. A non-contact voltage tester represents the most critical tool, allowing you to verify that circuits are de-energized before beginning work. Quality voltage testers include both audible and visual indicators, with some models capable of detecting voltage through insulation and outlet covers.
Essential hand tools include wire strippers rated for 12 and 14 AWG wire, needle-nose pliers with insulated handles, and both Phillips and flathead screwdrivers. Professional-grade tools feature comfortable grips and proper insulation ratings, reducing the risk of accidental contact with live wires during installation.
Your gfci outlet selection must match your circuit’s amperage rating—15-amp or 20-amp—and carry UL listing for safety compliance. Weather-resistant (WR) models are mandatory for outdoor installations, while tamper-resistant (TR) versions meet current California residential codes for indoor applications. The outlet packaging should clearly indicate these ratings and certifications.

Safety equipment includes insulated work gloves, safety glasses, and a reliable flashlight or headlamp for adequate illumination. Many electricians prefer LED headlamps that leave both hands free for detailed work. A sturdy step ladder ensures safe access to outlets mounted at standard heights.
Wire connectors and electrical supplies require careful selection based on your specific installation. Wire nuts in appropriate sizes for your wire gauge, high-quality electrical tape, and properly rated wire connectors ensure secure, long-lasting connections. For older homes, you might need specialized tools like wire pulling systems or a digital multimeter for troubleshooting existing wiring problems.
Consider investing in a plug-in gfci tester, an inexpensive device that verifies proper installation by testing the outlet’s ground fault protection functionality. These testers can identify wiring errors that compromise safety, making them valuable for both DIY installers and professional verification.
Safety Precautions Before Starting
Working with electricity demands respect and systematic safety procedures that can literally save your life. California OSHA workplace safety standards, while primarily applicable to commercial settings, provide excellent guidance for residential electrical work. The cardinal rule remains constant: assume all wires are live until proven otherwise through proper testing procedures.
Create a comprehensive safety checklist before beginning any electrical work, including emergency contact information for your local fire department and poison control. Keep a fully charged cell phone nearby and inform someone else in your household about your electrical work schedule. Never work alone on electrical projects, especially in wet or confined spaces.
Turn Off Power at the Circuit Breaker
Locating the correct circuit breaker requires systematic testing rather than relying on potentially outdated labeling. Plug a radio or lamp into the outlet you plan to replace, then systematically switch off breakers until the device stops working. This method ensures you’ve identified the correct circuit, as multiple outlets often share breakers in unexpected configurations.
Once you’ve identified the correct breaker, switch it to the off position and secure it with electrical tape or a breaker lock. Professional electricians often tape a note explaining the work in progress, preventing accidental power restoration by family members. Test other outlets on the same circuit to confirm power is off throughout the entire circuit, as California homes frequently have outlets in different rooms sharing a single breaker.
Document which breaker controls which outlets using a permanent marker or label maker for future reference. This documentation proves invaluable for subsequent electrical work and helps other family members understand your home’s electrical layout. Take photos of your electrical panel with breaker positions clearly visible for additional documentation.
Verify Circuit is De-energized
Use your non-contact voltage tester on all outlet terminals and visible wire connections, testing each wire combination methodically. Check hot to neutral, hot to ground, and neutral to ground connections, as some wiring configurations can maintain dangerous voltage even when the main breaker is off. Quality voltage testers include self-test features that verify the device is working properly.
Test your voltage tester on a known live circuit before beginning work to ensure it’s functioning correctly. This verification step prevents the dangerous assumption that absence of an alert means absence of voltage when your tester might be malfunctioning. Many professional electricians test their meters before and after every electrical job as standard practice.
Wait at least five minutes after turning off power before beginning work, allowing any capacitors in connected devices to discharge completely. Some electronic devices and fluorescent fixtures can store dangerous electrical charges even after power disconnection. This waiting period represents a small investment in time that significantly improves safety.
Step-by-Step GFCI Installation Process
The installation process requires methodical attention to detail, as improper connections can create dangerous conditions while appearing to function normally. Begin by gathering all tools and materials in your work area, ensuring adequate lighting and clear access to the electrical box. Professional electricians often lay out tools in a specific order to maintain organized workflow and prevent dangerous fumbling for equipment.
Document the existing installation with photos before disconnecting any wires, creating a reference for proper reconnection if questions arise. These photos should clearly show wire colors, connection points, and the overall wiring configuration. Digital photos allow you to zoom in on specific details during the installation process.
Removing the Existing Outlet
Unscrew the outlet from the electrical box carefully, pulling it straight out without twisting or yanking on connected wires. Older outlets may be tightly fitted, requiring gentle back-and-forth motion to free them from the box. Excessive force can damage wire insulation or pull wires out of their connectors inside the wall.
Take a detailed photo of the existing wire connections before disconnecting anything, noting which wires connect to which terminals. Remove wire nuts by turning them counterclockwise, or unscrew terminal connections systematically. Keep track of wire nuts and screws, as you’ll need them for the new installation.
Inspect the electrical box for damage, cracks, or signs of overheating that might indicate previous electrical problems. The box must be securely mounted and large enough to accommodate the gfci outlet, which is typically larger than standard receptacles. Loose or damaged boxes require professional attention before proceeding with outlet installation.
Identifying Line and Load Wires
Correctly distinguishing between line wires (power source from the electrical panel) and load wires (continuing to downstream outlets) represents the most critical aspect of gfci installation. Reversed connections disable gfci protection while allowing the outlet to provide power, creating a dangerous false sense of security.
The safest method for identifying line wires involves temporarily restoring power after carefully separating all wire groups. Use your voltage tester to identify which wires carry voltage—these are your line wires. Immediately turn power back off before proceeding with connections. This method works reliably even in complex wiring situations where wire colors might be misleading.
Load wires are only necessary when you want to protect additional outlets downstream from your gfci installation. If you’re replacing a single outlet at the end of a circuit, you may only have line wires present. Understanding your home’s wiring configuration helps determine whether load connections are needed.
California electrical codes follow standard color conventions: black or red wires are hot (line), white wires are neutral, and green or bare copper wires provide grounding. However, older installations might not follow these conventions, making voltage testing essential for safe identification.
Connecting Wires to GFCI Outlet
Connect line wires to the terminals marked “LINE” on your gfci outlet, typically identified with tape or molded indicators on the back of the device. Line terminals receive power from your electrical panel and must be connected correctly for the gfci to function. Many gfci outlets have line terminals on top and load terminals on bottom, but always verify markings on your specific device.
Attach load wires to “LOAD” terminals only when protecting additional outlets downstream from your gfci installation. If no downstream protection is needed, leave load terminals empty. Never connect line wires to load terminals, as this creates the dangerous reversed connection that disables gfci protection.

Secure the ground wire to the green grounding screw, forming a clockwise loop that tightens as you turn the screw. The ground wire connection provides safety protection and must be tight and secure. For metal electrical boxes, connect an additional ground wire from the outlet to the box itself using a grounding screw.
Ensure all connections are mechanically and electrically secure, with no bare wire visible outside the terminals. Loose connections create heat, arcing, and potential fire hazards. Gently tug on each wire after connection to verify it’s properly secured. Follow the torque specifications provided with your gfci outlet for optimal connection security.
Common Installation Mistakes to Avoid
Understanding frequent installation errors helps prevent dangerous situations that compromise gfci functionality. Many of these mistakes create outlets that appear to work normally but fail to provide crucial electrical protection. Professional electricians see these errors regularly, particularly in DIY installations where proper testing wasn’t performed.
The consequences of improper gfci installation extend beyond simple device failure. Incorrect wiring can create shock hazards, fire risks, and code violations that affect home insurance coverage and resale value. Many installation mistakes aren’t immediately apparent, remaining hidden until an electrical fault occurs or professional inspection reveals the problems.
Reversing Line and Load Connections
Reversing line and load connections represents the most dangerous and common gfci installation mistake. This error creates an “always hot” condition where the outlet provides power but offers no ground fault protection. The outlet appears to function normally, providing a false sense of security while leaving users vulnerable to electrical shock.
When line and load connections are reversed, the gfci outlet itself becomes unprotected, and any downstream outlets lose their protection as well. The test and reset buttons may not function properly, or they might work intermittently, making the problem difficult to diagnose without proper testing equipment.
Proper labeling techniques during wire removal prevent confusion during installation. Use masking tape and a permanent marker to label line and load wire groups before disconnecting the old outlet. Take multiple photos from different angles to document the original wiring configuration for reference during installation.
Testing methods to verify correct line/load connections include using the outlet’s test button and confirming it trips immediately, then checking that downstream outlets (if any) also lose power when the gfci trips. A plug-in gfci tester provides additional verification of proper wiring and protection functionality.
Testing Your New GFCI Outlet
Proper testing procedures ensure your gfci installation provides the intended electrical protection. The testing process involves multiple steps using both the outlet’s built-in test features and external testing devices. Never assume a gfci outlet is working correctly without performing these verification procedures.
Begin testing immediately after installation with power restored at the circuit breaker. Press the “TEST” button on the outlet—power should cut off immediately, and the “RESET” button should pop out if it has one. If the outlet doesn’t trip when tested, you have a wiring problem that requires immediate attention before the outlet can be safely used.
Press the “RESET” button to restore power, listening for a definitive click that indicates proper engagement. The outlet should now provide power normally. This basic test verifies the gfci’s internal mechanism is functioning, but additional testing confirms proper wiring and protection scope.
Use a plug-in gfci tester for comprehensive verification of your installation. These inexpensive devices test multiple fault conditions and can identify wiring errors that might not be apparent through button testing alone. The tester should indicate proper wiring and successful gfci tripping when it simulates a ground fault condition.
Monthly testing maintains long-term electrical safety and allows early detection of gfci deterioration. Mark your calendar or set phone reminders to test all gfci outlets in your home regularly. Outlets that fail monthly testing should be replaced immediately, as their protection may be compromised even if they still provide power.
Document your testing schedule in a maintenance log, including dates, locations, and results. This documentation proves valuable for insurance purposes and helps track outlet performance over time. Replace any gfci outlet that’s more than 10 years old or fails testing, as internal components can degrade and compromise protection.
California Electrical Code Requirements for GFCI Outlets
California’s electrical code requirements for gfci outlets exceed basic National Electrical Code standards in several important areas. The California Electrical Code (CEC), based on the 2022 NEC adoption, mandates gfci protection in specific locations where electrical shock risks are elevated due to water presence or outdoor conditions.
Current CEC requirements include gfci protection for all bathroom receptacles regardless of distance from water sources, kitchen outlets within 6 feet of sinks, all garage outlets, basement and crawl space receptacles, and outdoor outlets. Additionally, California requires gfci protection for laundry room outlets and some workshops where portable tools are commonly used.
California’s unique weather considerations add complexity to outdoor gfci requirements. Coastal regions face salt air corrosion that can affect electrical connections, while desert areas experience extreme temperature variations that stress electrical components. These conditions require weather-resistant gfci outlets with appropriate environmental ratings for reliable long-term performance.
Permit and inspection requirements vary significantly among California municipalities, with major cities like Los Angeles, San Francisco, and San Diego maintaining different standards. Los Angeles typically requires permits for new electrical outlets but not direct replacements, while San Francisco has stricter requirements that include permits for many electrical modifications. San Diego falls between these approaches with moderate permit requirements.
Arc Fault Circuit Interrupter (AFCI) requirements often accompany gfci installations in bedrooms and living areas, creating combination protection systems. These requirements have expanded in recent code cycles, with new construction requiring both AFCI and gfci protection in many locations. Understanding these combined requirements helps ensure complete code compliance.
Professional electrical work in California requires proper licensing, bonding, and insurance coverage. Licensed electricians must complete continuing education requirements and maintain current knowledge of evolving electrical codes. This professional oversight ensures installations meet safety standards and provides recourse if problems arise.
FAQ
Do I need a permit to install GFCI outlets in California?
Permit requirements vary by city and county throughout California. Simple like-for-like replacements typically don’t require permits, but new installations or circuit modifications usually do. Check with your local building department as cities like San Francisco and Los Angeles have specific requirements that may differ from state standards. Some jurisdictions require permits for any electrical work that increases capacity or adds outlets in new locations.
Can I install a GFCI outlet in a circuit with aluminum wiring?
Aluminum wiring requires special handling and should only be worked on by licensed electricians familiar with aluminum wire connections. Homes built between 1965-1973 often have aluminum wiring that requires compatible connectors and specific techniques to prevent dangerous arcing. Improper connections can create fire hazards, making professional installation strongly recommended for any electrical work involving aluminum conductors.
Why does my GFCI outlet keep tripping after installation?
Frequent tripping usually indicates a ground fault in the wiring, a defective gfci outlet, or incorrect line/load connections. Check all wire connections for tightness, verify proper line/load wiring according to device markings, and test with a different electrical device to rule out appliance issues. If problems persist after these checks, contact a licensed California electrician as the issue may involve hidden wiring problems or circuit overloading.
How do I install GFCI protection for an entire bathroom circuit?
For protecting multiple bathroom outlets, you can either install a gfci outlet at the first outlet in the circuit with load connections to downstream outlets, or install a gfci circuit breaker in the electrical panel. Panel work requires a licensed electrician in most California jurisdictions and typically needs permits and inspection. The circuit breaker option provides comprehensive protection and eliminates the need for multiple gfci outlets in the same area.
What’s the difference between 15-amp and 20-amp GFCI outlets?
Use 15-amp gfci outlets on 15-amp circuits and 20-amp gfcis on 20-amp circuits, ensuring the outlet amperage matches or is less than the circuit breaker rating. Kitchen countertop outlets in California typically require 20-amp circuits with 20-amp gfci outlets per current electrical codes. The outlet face design differs between amperages, with 20-amp outlets having a T-shaped slot to accommodate both 15-amp and 20-amp plugs, while 15-amp outlets only accept standard 15-amp plugs.